
This post may include affiliate links.
Origami enthusiast, Julius, first contacted me in October of 2020. He had a few questions about the size and capacity of my DIY Mobile Kits, and he wanted to know if there was room for more than just the 10 models it was designed to hold. I sent him a layout of what it would look like with the 10 models, along with one of where he could potentially fit additional models.

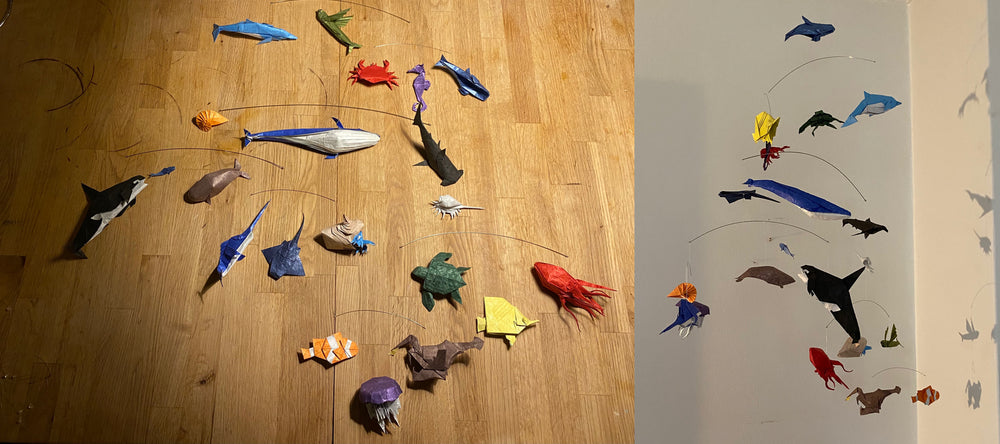
Julius' first mobile is a Sea Themed Mobile. It's been months in the works - he's been test folding a variety of unique and extremely complex models. There were a series of steps Julius had to follow for each model he wanted to include in the mobile. He had to learn how fold the model first, decide if the size of the completed model was what he wanted in the mobile, change the size of paper he needed, and fold the model again and again, until he had a successfully completed model in the size that he wanted.
The entire time he had been working on his collection of models for the mobile, he had been posting pictures of the models on his Instagram account, @juliusorigami where you can follow him. He has included the details of who designed the model, as well as the paper type and size he used to fold the model. He happened to folded the Murex from a book I also own, Origami Sea Life by John Montroll and Robert Lang - this is a great book for advanced origamists!
Julius only recently arrived at the assembly phase of the mobile, and before beginning he reached out to me with a few more questions. He had folded even more models than he had originally planned to, and wanted some input on where his additional creatures might fit into the mobile. He didn't want to leave any models out, which is understandable based on the amount of work he had put into folding them in the first place!
He sent a picture of his current layout and I had some ideas of what could be moved around. I reminded him to watch the video tutorial on assembly before beginning, and made some layout suggestions. Julius made adjustments, and when he was happy with the way everything looked he was ready for assembly.

The next email I got from Julius made me feel awful! He had tied everything together, and when he lifted the mobile off the table several of the levels collapsed. The more complex models that he had folded began with large sheets of paper, which added to the weight of each model. His knots hadn't been tight enough so when the extra weight pulled down on the wires, the loose knots slid off their centered and balanced positions, throwing the whole mobile off-balance.

He needed tighter knots in order to hold all the levels in balanced positions. I sent him a sketch (pictured above) of a good way to tie a tighter knot that wouldn't budge, and also made a video of how to tie that sort of knot. Two important parts of tying a tight knot for a mobile is to make sure the knot is as close to the wire as possible, and to use flat nosed pliers to pull on the short end of the string to tighten it. My favorite flat nosed pliers were originally from my dad's tool box so I don't know the brand, but they are very similar to these with the foamy grip handles.

With this new knowledge, Julius was able to finish putting the mobile together - and what a mobile it is! With the extremely detailed models he used, and the way he arranged them, it's quite a mesmerizing underwater scene. Julius has captured this beautiful scene in the form of a unique mobile that he and his friends and family will enjoy for years to come.
Being involved in this creative process has been so neat, and I'm honored that he chose my DIY Mobile Kit to hold his amazing origami! I'm eager to see what his next themed mobiles will be all about!
Order the “Wires Only” Kit to give your own origami a cool place to hang too, and be sure to share this post with other origami enthusiasts in your life!